3PAR SNMP

SNMP Primer

Before we dive into configuring SNMP for 3PAR lets do a quick review of what SNMP is, SNMP stands for Simple Network Management Protocol. SNMP is used for configuring and collecting information from network devices including storage. The focus of this post is using SNMP as a monitoring tool for alerts.

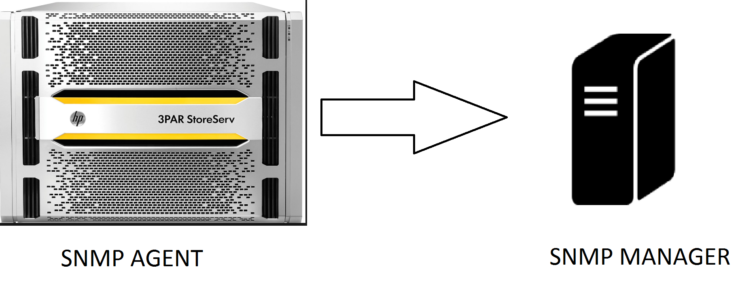
An SNMP infrastructure is based around two components, the manager which acts as the collection point for all alerts and agents which are software on the end points that report back to the manager.

What information can be monitored is defined by a MIB (Management Information Base). The MIB’s are a collection of managed objects identified by Object Identifiers (OID). These OID list the characteristics of the devices that can be managed.

3PAR and SNMP

3PAR has its own SNMP agent built into the device. The 3PAR MIB is contained within the 3PAR CLI download. The HP 3PAR SNMP agent supports SNMPv3, SNMPv2c, SMI-v2 standards.

You will notice SMI-v2 listed as a compatible standard with 3PAR, SMI stands for Storage Management Initiative. SMI was launched by SNIA to provide a common framework all storage vendors could adhere to, allowing common management tools across all vendors.

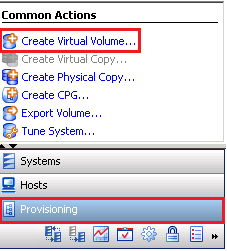
Configuring SNMP for 3PAR

You will configure SNMP for 3PAR using the CLI, it’s dead easy and I will provide all the steps you will need below.

1 Once you are connected to the 3PAR CLI you will add the SNMP Manager.  Remember the manager is the device that is the trap destination i.e. the SNMP server

addsnmpmgr <manager ip address>

The above command should be sufficient for most situations, but if your manager server requires a password or other config different from the default you can use the following options:

  • -p <port_number> – Specifies the port number where the manager receives traps. The default port 162
  • -pw <password> – Specifies the manager’s access password, if the manager has one
  • -r <number> – Specifies the number of times the system will attempt to resend the trap if the manager is not available. The default is 2
  • -t <seconds> – Specifies the number of seconds to wait between retries. The default is 200

2 When using the addsnmpmgr  command the community name will be set to public, if you need to set a custom community name or change the access permissions use the following command:

setsnmppw –r <community name>

(-r = read-only, -w = write-only and -rw = read-write)

3 You can view your 3PAR SNMP configuration with the following command 

showsnmpmgr

4 Finally you can send a test trap to make sure everything is working OK

checksnmp

Enabling SMI

If your monitoring solution requires SMI you will need to enable it on the 3PAR.

Open the 3PAR Command Line Interface (CLI) and connect to the 3PAR system:

1 Enable the SMI-S provider startcim

2 Check status of SMI-S Provider showcim

3 Restarting the SMI-S Provider stopcim –f –x

To stay in touch with more 3PAR news and tips connect with me on LinkedIn and Twitter.

Prelude – VSphere 6 and 3PAR

One week from today (3rd February) VMware are advertising a big launch event, whilst it doesn’t specifically say its for VSphere 6 if its anything else  I’ll change my name to VNXDude. Although VSphere 6 has been in public beta for some time it has been under NDA and so information about what is in the new release has been scarce.


1promo


What do we know?

What has been announced in the new version of VSphere is some improvements to FT, long distance VMotion plus the introduction of VVols. The number of game changing features being added to the previous few version of VSphere appears to have slowed, with the real emphasis being on developing the eco system – NSX, VSAN and VVols i.e. the foundations of the software defined datacentre. This makes sense since we are all now used to the idea of server virtualisation, allowing us to pool compute and gain agility and flexibility with a policy driven approach, the next stage is to take this to all elements of the data centre. To get VMware embedded as the platform of choice to manage networking, storage etc. would give VMware a real strangle hold across the data centre.


If next week is indeed the launch of VSphere 6 and VVol’s come as part of that, this will be one of the biggest changes in the way storage admins have done business in some time. VVols introduce a one to one relationship between VMDK files and backend volumes on the storage array. There will be no file system as VSphere will talk directly to the array, allowing the workload to be off loaded to the storage system.  The storage system will also be able to directly expose its features such as RAID levels, replication and snapshot capabilities to VSphere, allowing the creation of policies matching VM requirements to storage capabilities. Check out this post I wrote previously if your interested in more details of VVols working with 3PAR.

 VVol Videos

To help introduce the idea of VVols I have posted links to a couple of videos on the topic. The first is a discussion on VVols from The CurrentStatus web chat and the second is a VVol deep dive from VMworld, both really interesting and well worth a watch.


I’ll bring you more news next week if I’m correct, or if not I will be busy changing the domain to VNXDude.com.

3Par 101 – Part 3 – Virtual Volumes and Vlun’s

In this 3PAR 101 series so far we have looked at 3PAR fundamentals and the systems unique approach to RAID, in Part 2 we looked into Common Provisioning Groups (CPGs)    Now we get onto the stage where we can provision some storage to hosts by using virtual volumes and vluns!

Virtual volumes (VV’s) are HPE’s terminology for what would most commonly be called a LUN, a LUN which has been presented or exported to a host is called a VLUN. Virtual volumes draw their space from CPG’s and come in two varieties Fully Provisioned Virtual Volumes (FPVV) and Thin Provisioned VV (TPVV). A FPVV uses all the allocated space upfront, so if a 100GB VV is created straight away 100GB of space will be used from the CPG. With a TPVV only the space that is demanded is used, so if a 100GB VV is created and only 50GB of that space is used only 50GB of space will be demanded from the CPG.

A thin provisioning licence is required to use TPVV and assuming this is in place TPVV are the default type of VV created. Today if you purchase a system you get the full licence bundle included and so this becomes less of a concern.

Another type of Virtual Volume was introduced with the 3PAR all flash systems.  The Thin Deduplicated Virtual Volume (TDVV) as the name suggested this was a volume that was both deduped and thin provioned.  3PAR OS 3.3.1 depreciated the TDVV volume type and made dedupe a property of a volume that could just be turned on. 3.3.1 also introduced the capability to enable compression on volumes.

Creating a VV and VLUN SSMC

Enough theory let’s get on and create a VV, first in the 3PAR SSMC:

1 Open SSMC and from the main menu select Virtual Volumes

2 Click the green Create Virtual Volume button on the top left of the screen

3 What appears next is the simple Virtual Volume creation screen.  The only information you have to supply is:

  • Name – the name you wish to call the Virtual Volume
  • System – If you are connected to more than one system, chose the system you want to create the volume on
  • Size  – How large the volume needs to be

Further fields you can change if you wish:

  • Provisioning – choose from thick or thin provisioning
  • CPG – Select a different CPG for storing the virtual volume in

4 If you want to create an additional volume you are done.  But if you need to set any of the following, choose Edit additional settings

  • Copy CPG – The CPG you want metadata and snapshots to be stored in
  • Number of volumes – if you want to create multiple volumes at the same time
  • Volume sets – Add the volume to a volume set
  • Comments – Add any comments you wish

5 Next we present the newly created volume to a host.  Still in the create virtual volume wizard select add

In the box that appears choose to export the volume to a host as below, or select to export it to a group of hosts using a host set.

To enable dedupe and compression on the volume follow the 3PAR Dedupe + Compression Deep Dive

Creating a VV –  CLI

This section looks at how we create a volume and then export it to a host using the command line.

createvv -tpvv -pol zero_detect NL_R6 VirtualVolume2 100G

Lets break down the CLI options a little

  • createvv – core command
  • -tpvv make thin provisioned volume
  • -pol zero_detect  scan for zeros on incoming writes
  • CPG name – in my case NL_R6
  • VV name – in my case VirtualVolume2
  • Size of volume – in my case 100GB

Creating a Vlun –  CLI

createvlun VirtualVolume2 auto host1
  • createvlun – core command
  • VV name – in my case VirtualVolume2
  • Lun ID – auto in this case
  • Hostname – host1

If you only use the new management tools for 3PAR that it your done, fineto. This blog has over 150+ 3PAR articles check out a selection of them here.  If you missed any of the 3PAR 101 series catch up on them:

Start here – Meet Chunklet!

3PAR 101 – Part 2 – CPG’s

3PAR 101 – Part 3 – Virtual Volumes and Vlun’s

Creating a VV –  3par management Console

If you still use the 3PAR management console then read on:

1     In the management pane select Provisioning and then from the common actions pane select Create Virtual Volume

VV1

2 Next you will see a welcome screen which has a lot of useful info on creating VV’s, if you do not want to see this again click the skip this step tick box and click next

VV2

3 The basic information you will need to complete when creating a VV is highlighted in the screenshot below.   Thin provisioned will be selected by default, enter the name and size and then the CPG you want the VV to sit in. Remember the CPG you choose will determine the performance and availability level of the volume. The copy CPG will only be needed if you use snapshots

4 The screenshot below shows what you will see if you tick the advanced options checkbox. Generally you can leave all this to deafult and will not need to select advanced options

VV4

5 The final screen shows a summary of the sections you have made, if you are happy just click finish here

Creating a Vlun – 3par management console

Next we need to export (provision) the virtual volume to the host

1 In the management pane select Provisioning and then from the common actions pane select Export Volume

VlunA

2 Next you will see a welcome screen which has a lot of useful info on creating VLUN’s, if you do not want to see this again click the skip this step tick box and click next

Vlun1

3 On the left hand side of the screen you need to select the name of the volume to export, on the right hand side you need to choose the host to export to. By ticking auto for export with LUN values it will automatically choose the LUN ID for you. When your happy with your selection click next

Vlun2

4 The final screen shows a summary of the sections you have made, if you are happy just click finish here

If you have missed it, check out parts One (3PAR architecture) and Two (CPG’s) of this 3PAR beginner guide series.

To stay in touch with more 3PAR news and tips connect with me on LinkedIn and Twitter.

Further reading

3PAR Concepts Guide

3PAR Best Practices