HPE grabs a bargain with Simplivity acquisition

New Blog URL

This will be the last post on 3ParDude.com all content and traffic will be moving across to d8taDude.com, so please update your favourites. D8taDude.com is not yet live, it will go live in the next few days when I do the switch over. If you follow via WordPress or e-mail no action is required I will move your subscription across. This is the new RSS feed and on Twitter I am now @d8taDude. The change is to give me more scope to cover a wider range of products, including of course Simplivity! This will not be at the cost of 3PAR coverage, which will continue as normal at the new address.

Rumors

When I first heard the rumors about the HPE Simplivity take over at the end of last year, I must say I was really excited. 3PAR has long been the jewel in HPE’S storage crown, but at times it has seemed like it’s stood alone. The real strength of a large company like HPE comes when they have a broad portfolio of products, meeting a range of customer’s needs and offering interoperability between them.

simplivity-highres

Bargain

The Simplivity deal was confirmed this week at a bargain basement price of $650 million. Given that 3PAR was acquired for $2.4 billion and SolidFire was purchased for $870 million this really does seem like a great price for one of the leading vendors in the hyper-converged space.

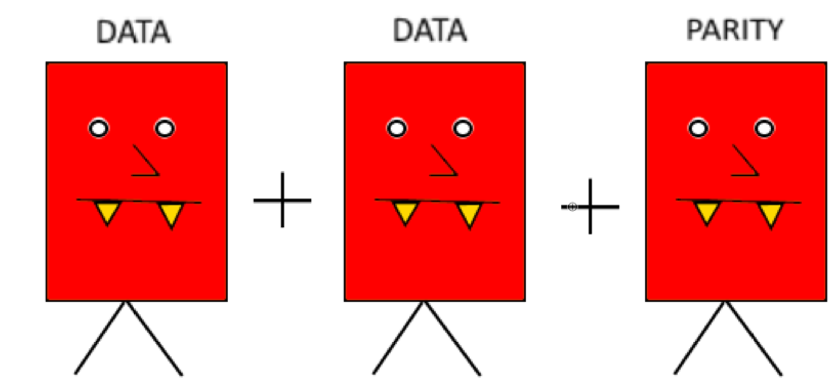
For those not familiar with Simplivity, they are the number two player in the hyper-converged market i.e. converged server and hypervisor in a single unit. The hyper-converged market has been growing very strongly, appealing to customers who have seen the simplicity and speed of deployment in the cloud and wish for a similar experience in their data centre. Hyper-converged appliances offer the rapid deployment and easy management customers are looking for. Since core components of the infrastructure are deployed /managed from a single interface and contained within the same piece of hardware.

Simplivity currently sell their offering in the form of what they call an OmniCube which is a 2U appliance bundling the compute, hypervisor and Simplivity software. Simplivity also currently offer solutions based on Cisco, Dell, Huawei and Lenovo hardware. Given that HPE is the world’s largest server manufacturer this is a great tie up. It seems unlikely the existing deals with other server manufacturers will continue beyond the day the deal goes live, and that future generations of Simplivity will be ProLiant based.

omni

Hyper-converged market pressure

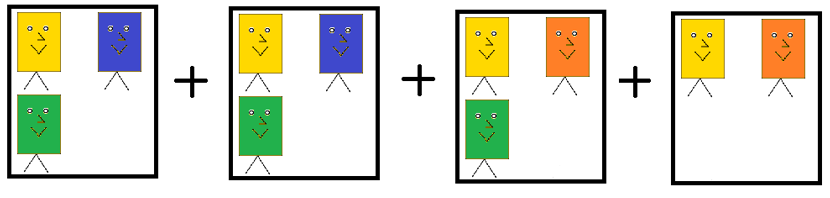
This must however be food for thought for the other hyper-converged players and the start-up storage market as a whole. Observers have been predicting the shake-up of the hyper converged market, which though growing strongly seemed to have a disproportionate number of companies competing. This along with several key players strengthening their position such as Nutanix managing to IPO, VMware’s VSAN product continuing to mature and now HPE’s deal must put even more pressure on the remaining vendors. Although it is worth noting that Nutanix stock finished the day after the announcement (18/1/16) down 6.26%.

Considerations

HPE’s handling of previous takeovers has been mixed, of course 3PAR was a real success. I think the winning formula was to bring across as many key individuals as possible, don’t do anything drastic initially to let the product speak for its self before offering integration with other products and common management tools etc. NetApp appears to have followed this sort of approach with SolidFire, which again looks like a successful acquisition

Real points of interest will be firstly to see what they do with the existing hyper converged range.  The HC systems based on the grand daddy of all hyper converged software Lefthand,  now looks in a perfect precarious position.  I don’t see them supporting and investing into separate product lines in the long term.

Integration with existing storage products such as 3PAR will likely be added to the roadmap, as well as integration with converged solutions such as Synergy.

Thanks for reading and remember future posts will be coming from d8taDude.com, the site will become accessible on switch over in the next few days. My new Twitter handle is @d8taDude

3Par 101 – Part 3 – Virtual Volumes and Vlun’s

In this 3PAR 101 series so far we have looked at 3PAR fundamentals and the systems unique approach to RAID, in Part 2 we looked into Common Provisioning Groups (CPGs)    Now we get onto the stage where we can provision some storage to hosts by using virtual volumes and vluns!

Virtual volumes (VV’s) are HPE’s terminology for what would most commonly be called a LUN, a LUN which has been presented or exported to a host is called a VLUN. Virtual volumes draw their space from CPG’s and come in two varieties Fully Provisioned Virtual Volumes (FPVV) and Thin Provisioned VV (TPVV). A FPVV uses all the allocated space upfront, so if a 100GB VV is created straight away 100GB of space will be used from the CPG. With a TPVV only the space that is demanded is used, so if a 100GB VV is created and only 50GB of that space is used only 50GB of space will be demanded from the CPG.

A thin provisioning licence is required to use TPVV and assuming this is in place TPVV are the default type of VV created. Today if you purchase a system you get the full licence bundle included and so this becomes less of a concern.

Another type of Virtual Volume was introduced with the 3PAR all flash systems.  The Thin Deduplicated Virtual Volume (TDVV) as the name suggested this was a volume that was both deduped and thin provioned.  3PAR OS 3.3.1 depreciated the TDVV volume type and made dedupe a property of a volume that could just be turned on. 3.3.1 also introduced the capability to enable compression on volumes.

Creating a VV and VLUN SSMC

Enough theory let’s get on and create a VV, first in the 3PAR SSMC:

1 Open SSMC and from the main menu select Virtual Volumes

2 Click the green Create Virtual Volume button on the top left of the screen

3 What appears next is the simple Virtual Volume creation screen.  The only information you have to supply is:

  • Name – the name you wish to call the Virtual Volume
  • System – If you are connected to more than one system, chose the system you want to create the volume on
  • Size  – How large the volume needs to be

Further fields you can change if you wish:

  • Provisioning – choose from thick or thin provisioning
  • CPG – Select a different CPG for storing the virtual volume in

4 If you want to create an additional volume you are done.  But if you need to set any of the following, choose Edit additional settings

  • Copy CPG – The CPG you want metadata and snapshots to be stored in
  • Number of volumes – if you want to create multiple volumes at the same time
  • Volume sets – Add the volume to a volume set
  • Comments – Add any comments you wish

5 Next we present the newly created volume to a host.  Still in the create virtual volume wizard select add

In the box that appears choose to export the volume to a host as below, or select to export it to a group of hosts using a host set.

To enable dedupe and compression on the volume follow the 3PAR Dedupe + Compression Deep Dive

Creating a VV –  CLI

This section looks at how we create a volume and then export it to a host using the command line.

createvv -tpvv -pol zero_detect NL_R6 VirtualVolume2 100G

Lets break down the CLI options a little

  • createvv – core command
  • -tpvv make thin provisioned volume
  • -pol zero_detect  scan for zeros on incoming writes
  • CPG name – in my case NL_R6
  • VV name – in my case VirtualVolume2
  • Size of volume – in my case 100GB

Creating a Vlun –  CLI

createvlun VirtualVolume2 auto host1
  • createvlun – core command
  • VV name – in my case VirtualVolume2
  • Lun ID – auto in this case
  • Hostname – host1

If you only use the new management tools for 3PAR that it your done, fineto. This blog has over 150+ 3PAR articles check out a selection of them here.  If you missed any of the 3PAR 101 series catch up on them:

Start here – Meet Chunklet!

3PAR 101 – Part 2 – CPG’s

3PAR 101 – Part 3 – Virtual Volumes and Vlun’s

Creating a VV –  3par management Console

If you still use the 3PAR management console then read on:

1     In the management pane select Provisioning and then from the common actions pane select Create Virtual Volume

VV1

2 Next you will see a welcome screen which has a lot of useful info on creating VV’s, if you do not want to see this again click the skip this step tick box and click next

VV2

3 The basic information you will need to complete when creating a VV is highlighted in the screenshot below.   Thin provisioned will be selected by default, enter the name and size and then the CPG you want the VV to sit in. Remember the CPG you choose will determine the performance and availability level of the volume. The copy CPG will only be needed if you use snapshots

4 The screenshot below shows what you will see if you tick the advanced options checkbox. Generally you can leave all this to deafult and will not need to select advanced options

VV4

5 The final screen shows a summary of the sections you have made, if you are happy just click finish here

Creating a Vlun – 3par management console

Next we need to export (provision) the virtual volume to the host

1 In the management pane select Provisioning and then from the common actions pane select Export Volume

VlunA

2 Next you will see a welcome screen which has a lot of useful info on creating VLUN’s, if you do not want to see this again click the skip this step tick box and click next

Vlun1

3 On the left hand side of the screen you need to select the name of the volume to export, on the right hand side you need to choose the host to export to. By ticking auto for export with LUN values it will automatically choose the LUN ID for you. When your happy with your selection click next

Vlun2

4 The final screen shows a summary of the sections you have made, if you are happy just click finish here

If you have missed it, check out parts One (3PAR architecture) and Two (CPG’s) of this 3PAR beginner guide series.

To stay in touch with more 3PAR news and tips connect with me on LinkedIn and Twitter.

Further reading

3PAR Concepts Guide

3PAR Best Practices


3Par 101 – Meet Chunklet!

I wanted to start a series of posts looking at 3PAR 101, a back to basics/ beginners guide to 3PAR. The perfect place to start is by looking at the 3PAR architecture, and specifically how 3PAR uses layers of abstraction to deliver a unique and flexible approach to RAID.


Introducing Chunklet!

Let’s introduce Chunklet, as its Chunklet that enables 3PAR to have a unique architecture and enable many of its capabilities.

a1 - meet chunklet

Traditional RAID

Things were not always so good for Chunklet, back in the day Chunklet was a bad dude with a bad attitude. He existed on a traditional storage array and since he didn’t get on with anyone he demanded a whole disk to himself. So on a traditional storage array to set up a simple RAID 5 2+1 set, you would need 3 disks, 2 data and 1 parity each of which was dedicated entirely to being part of that RAID set. This traditional and inflexible approach is shown in the diagram below:

bad1

 3Par Chunklet

Over time Chunklet mellowed out, he realised hey it’s good to share and instead of demanding a whole disk to himself he was happy with 1GB of any given disk. This is what happens in a 3PAR system, whenever a disk is added to the system it is divided into 1GB blocks of space called Chunklets. Prior to the 7000 and 10,000 series the chunklet size was 256MB, the reason for the increase to 1GB was to reflect the growing size of disks.

2 SINGLE DISK WITH CHUNKS - small

3Par RAID

In a 3PAR system like in a traditional storage system RAID is used to combine multiple disks together but instead of using entire disks data is striped across chunklets. Let’s zoom in on a small number of disks to see how this looks.

3 logical disks -small

In this simple example above we see 3 physical disks each with 4 chunklets per disk, each different colour represents membership of a different RAID 2+1 set. For example there is a yellow RAID set made up of a data chunklet from the first 2 disks and a parity chunklet from the 3rd disk, real world there would be a lot more chunklets per disk i.e. a 450 GB disk would consist of 450 chunklets. To summarise in a traditional storage system each disk is dedicated to being a member of one RAID set, by using chunklets multiple RAID sets can co-exist on the same set of physical disks.


Looking at the diagram below we see chunklets enable not only multiple different RAID sets to exist on a single physical disk but that they can also have different RAID levels. The diagram show 4 physical disks with different coloured chunklets representing membership of different RAID sets. The orange and blue chunklets are members of a RAID 1 1+1 set co-existing alongside a RAID 5 2+1 (Green) set and a RAID 5 3+1 (yellow), all on the same physical disks.

4 logical disks - different raid types - small

 Logical Disks

To allow for large volumes of data and to enable the data to be striped across as many disks as possible, multiple RAID sets are combined together in rows. The number of RAID sets combined together is the row size, for example if the above orange and blue RAID 1 sets are combined together the row size would be 2. A logical disk is a collection of chunklets arranged as rows of a RAID set.


CPG

The next logical layer down is CPG’s (Common Provisioning Groups). CPG’s are simply a number of logical disks joined together to form a contiguous space. We will cover CPG’s in part 2 of this series in detail, but for now just know CPG’s are a pool of space. Whilst CPGs have many unique features for simplicity in traditional terminology you can think of a CPG as a RAID group.


Virtual Volumes

Finally we get to the building block we are able to assign to a host, Virtual Volumes. Virtual volumes (VV’s) draw their space from CPG’s and in the case of thin provisioned VV’s grow on demand and only consume space from the CPG as needed. In traditional terminology you can think of a virtual volume as a LUN.


Putting It All together

Let’s pull everything together we have looked at so far to see the complete picture – when a disk is added to the system it is subdivided into 1GB blocks called chunklets, these chunklets are arranged as rows of a RAID set to form logical disks. CPG’s (common provisioning groups) pool together the capacity of the logical disks. Virtual volumes then draw their space from the CPG and can be presented to hosts. The diagram below is taken from the HPE 3PAR best practices guide and again shows how all the different logical levels fit together but in a pictorial format.

5 layers

What have chunklets ever done for me?

Phew, that’s the hard bit done now let’s look at benefits chunklets give. The benefits in summary are flexibility and performance, let’s look at some examples:

  • Maximise utilisation – The same physical disks can provide many different RAID and availability options
  • Performance – data is distributed across many disks enabling wide striping and eliminating hot spots
  • Planning – No need to size and allocate space to RAID groups upfront. With 3PAR you can create CPG’s as required with no upfront space requirement and then space is only consumed as it is demanded.
  • Drive size flexibility – since RAID is striped at the chunklet level and not the entire disk different sized disks can be used
  • RAID flexibility – RAID levels can easily be changed
  • Disk failures – when a disk fails the spare chunklets are spread across many physical disks so it a one to many operation, allowing a quick rebuild

This is a complicated topic but hopefully this post has helped to gain a fundamental understanding of 3PAR architecture. Continue reading this 3PAR 101 guide:

3PAR 101 – Part 2 – CPG’s

3PAR 101 – Part 3 – Virtual Volumes and Vlun’s


Don’t forget to keep in touch on Twitter and LinkedIn.

Further Reading:

Hans De Leenheer

3PAR Concepts Guide