This guest post by Armin Kerl runs you through the procedure to rename a 3PAR remote copy (RCOPY) group. The truth is, that you cannot rename them, so the correct title should be:
How to move a Volume between RCopy Groups without the need to do a full resync,
below are the steps you need to take:
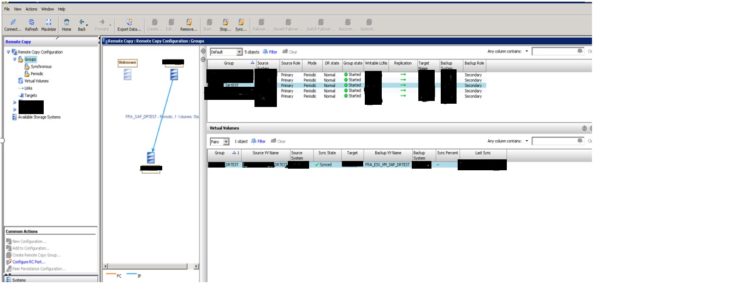
1 First, create a new empty RCopy Group with the new Name (using SSMC).
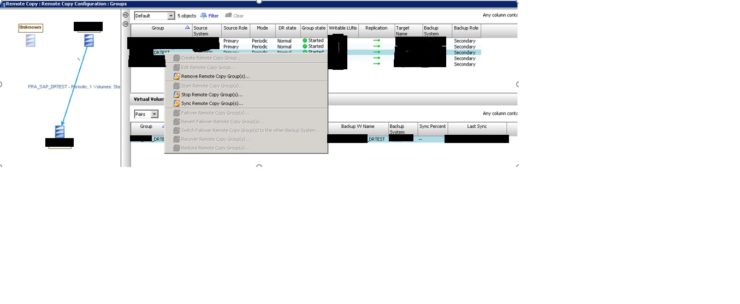
2 Next we need to stop the RCopy group and unexport the volume. From the CLI stop the Old_Group:
showrcopy -d groups Old_Group

stoprcopygroup Old_Group
Unexport the Volume from Old_Group on the Secondary Site (using SSMC).
3 Having stopped the RCOPY group and unexported the volume we can remove the Volume from Old_Group but choose to keep the snapshot:
dismissrcopyvv -keepsnap Prim_Volume Old_Group
4 To avoid a full resysnc of the volume we want the new RCOPY group to use the existing snapshot. Find the newly generated snapshot name:
showvv -p -type vcopy
5 Add the Volume to the new New_Group:
admitrcopyvv Prim_Volume:sv.0.rcpy.36.264.1 New_Group Sec_3PAR:Sec_Volume.r
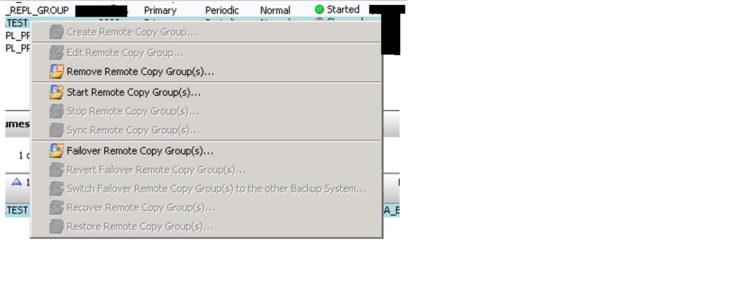
6 Start and check the New_Group:
startrcopygroup New_Group
showrcopy -d groups New_Group
7 If the Old_Group hasremaining Volumes, do the same:
startrcopygroup Old_Group

showrcopy -d groups Old_Group
8 Export the Volume again on the secondary 3PAR (use SSMC).
9 Finally delete the temporary Snapshot:
removevv sv.0.rcpy.36.264.1
Armin is a regular contributor to d8taDude.com, if you would like the chance to share your experiences in front of thousands of reader check out the guest posting opportunities.


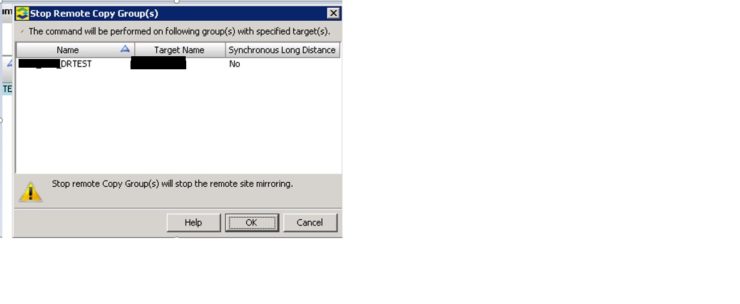
 Now one pop-up window will open click OK and after that one more pop-up will open and click yes here
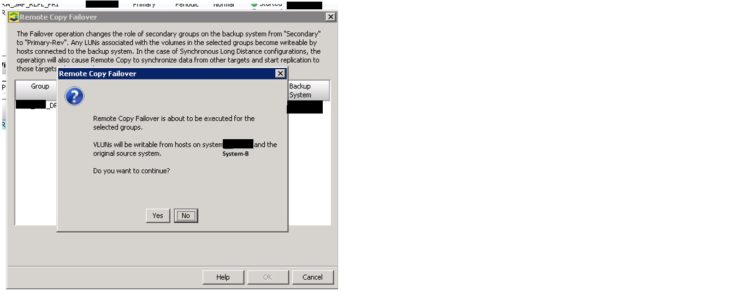 Now there should be Group state as “stopped” as per below picture. Replication status in the table will be as “Stopped” and Backup system (i.e. System-B) will show its role as “Primary-Rev” with DR state as “Failover”.
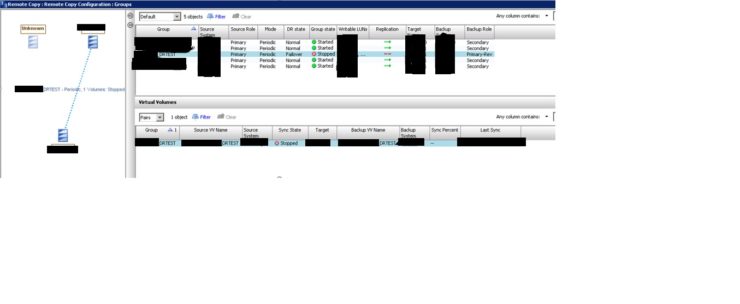 This completes all failover steps.
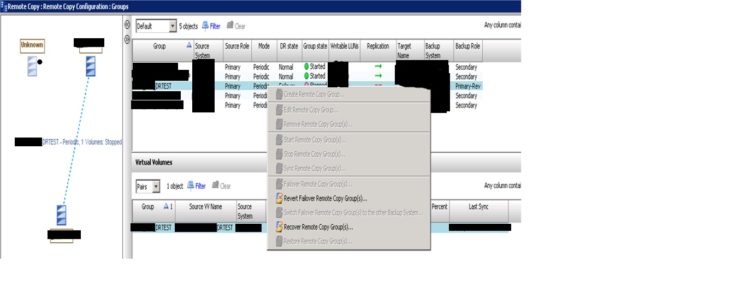
 Once clicked on OK prompt, there will be one more pop-up, press yes now. Important to note that VLUNs will not be writable now on source system “System-A” and it will be in writable mode on backup system “System-B”.
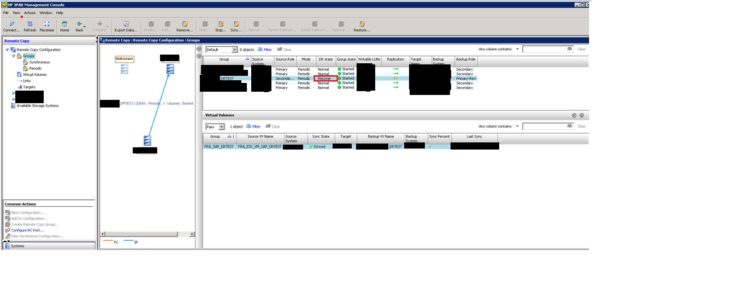 c) Verification:
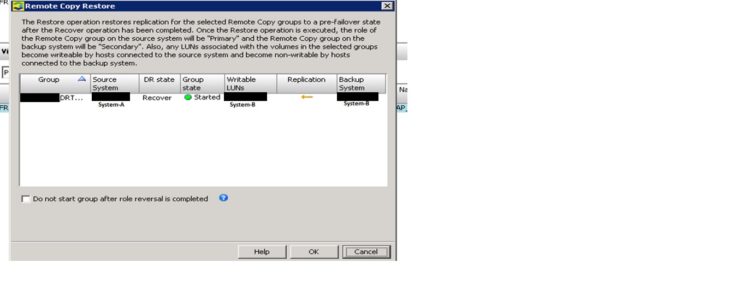 And once we will click on the OK in the above pasted picture, then there will be one more pop-up to click Yes or No, we have to click “Yes” to complete the process.
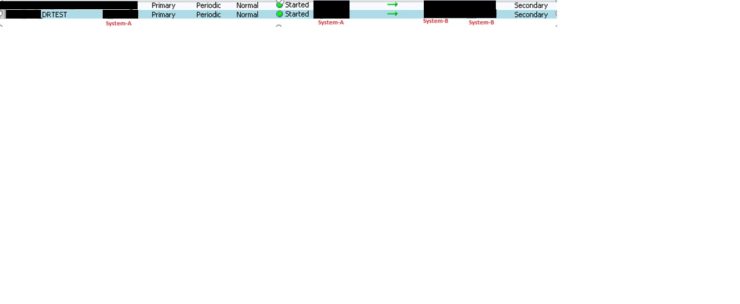
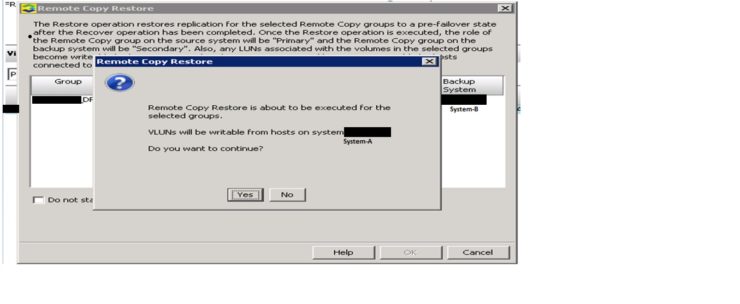 Now the system should be able to see the status of restored replication group as it was in actual state. Below picture shows the actual status with System-A system as Primary and normal state and replication pointing from System-A to System-B.