SUM-Welcome

Simplified driver and firmware update with iLO 5

This guest post is brought to you by Armin Kerl, if you fancy trying you hand at blogging check out our guest posting opportunities.

Principle:

The Gen10 servers now have a 1GB reserved space in the NVRAM for firmware and driver files with iLO 5, it’s called The iLO Repository. We are now able to upload firmware and drivers direct to the iLO NVRAM. This can be *.bin, *.fwpkg for firmware, *.zip for ESX, *.exe for Windows, or *.rpm for Linux.

The Integrated Software Update Manager (iSUT) service in the OS can monitor the iLO repository content. If there is something new, it pulls the update and then installs firmware and drivers inside the OS. A reboot is usually necessary afterwards. No more booting from the SPP ISO Image for firmware updates and you can specify several server stages or even reboot a number of times.

You can get more information at the HPE SUT Site here and in the User Guides

The iLO can be fuelled with updates in several ways, I will explain the most common.

  1. Upload individually in iLO under the Firmware Tab.
  2. Launch the Software Update Manager (SUM) from the Service Pack for ProLiant (SPP), and deploy.
  3. Distribute the SPP with iLO Amplifier.

I will now explain 2 and 3 by using an ESXi server as an example.

Prepare

First, the iSUT must be installed on the target server and set to AutoDeploy. The iSUT should already be installed with HPE ESX Image.

Check It:

[root@SRVESX1:~] sut -status

System Update Manager...................: OS Administrator

Task Status.............................: Bios:N/A; LocalStorage:N/A; Deploy:Idle

Staging Directory.......................: /tmp/sut/stagingdirectory

Baseline URI............................: None

Baseline Version........................: Waiting for staging

Mode of Operation.......................: OnDemand

Polling Interval In Minutes.............: 5

Force Deploy............................: No

Optional Components.....................: None

EnableiLOQueuedUpdates..................: true

User Action Needed......................: To perform the firmware updates import the server to OneView or use iLO Amplifier Pack. If imported into OneView create a server profile with a firmware baseline and apply the profile to the server.

iLO Security Mode.......................: Production

iLO CAC Smartcard Authentication........: Off

iLO CAC Strict Mode.....................: Off


Now set iSUT to Deploy Updates:
[root@SRVESX1:~] sut -set mode=AutoDeployReboot

Set Mode: AutoDeployReboot

Service will be registered and started

Service already registered

SUT Service started successfully

Registration successful

You can set the iSUT mode to AutoDeployReboot mode.

However, iSUT reboots the VMware ESXi host only if the host is in maintenance mode.

If it is not Installed, Download HPE Utilities Offline Bundle for ESXi 6.7

https://vibsdepot.hpe.com/

Use Service Pack for ProLiant

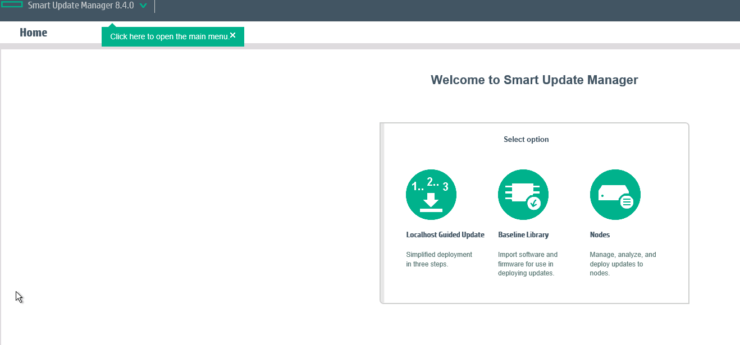
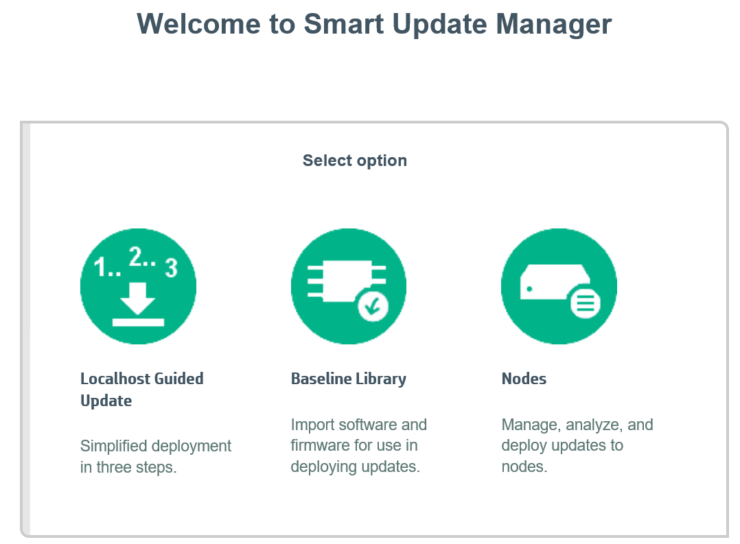
Mount the SPP ISO on the deployment PC/server and start SUM with launch_sum.bat.

SPP-LaunchSUM

SUM-Welcome

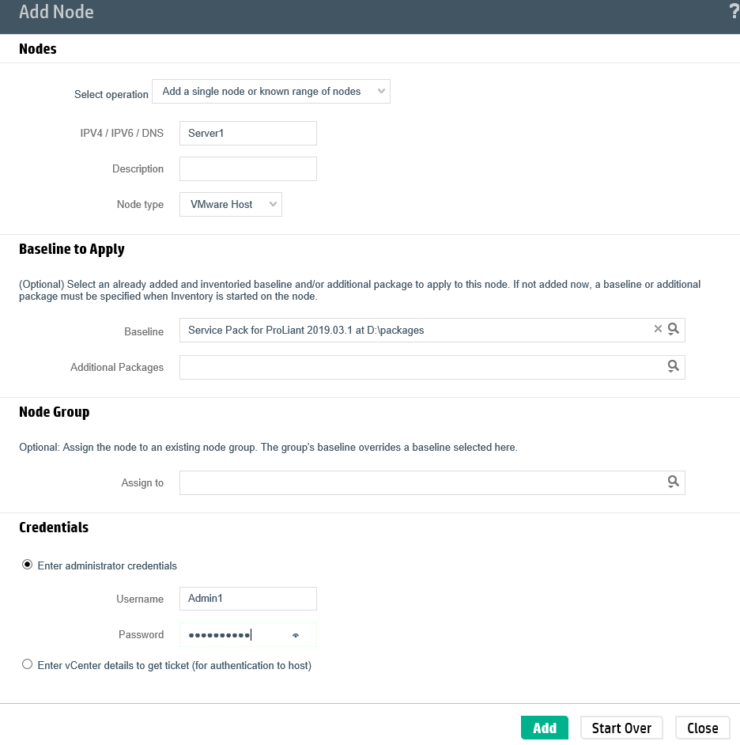
Select Nodes and add your Target Server using the iLO IP, not the OS IP.

Node Type:      iLO

Baseline:           Your Service Pack ProLiant

SUM-AddNode

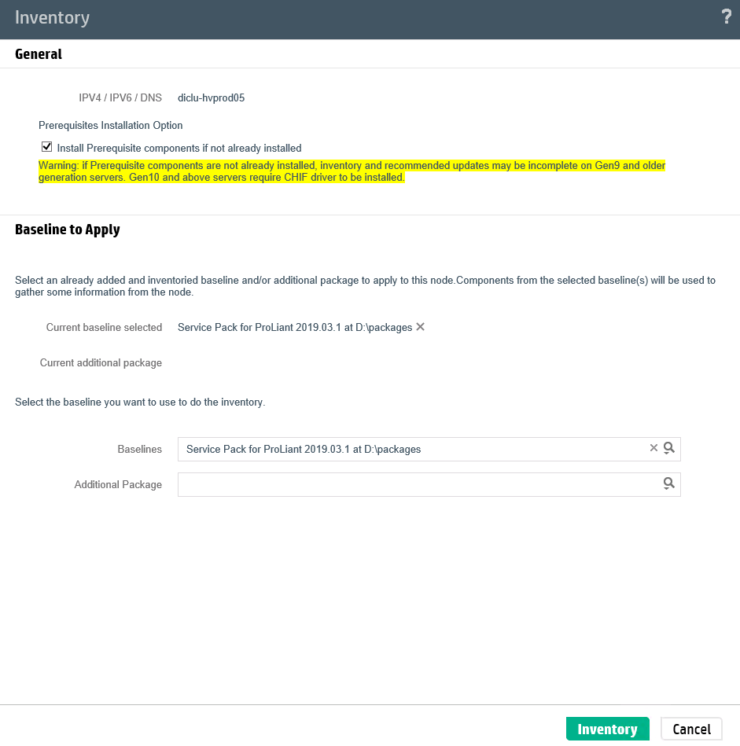
Now, first Start an Inventory and then choose Deploy.

SUM-Review

SUM-Deploy

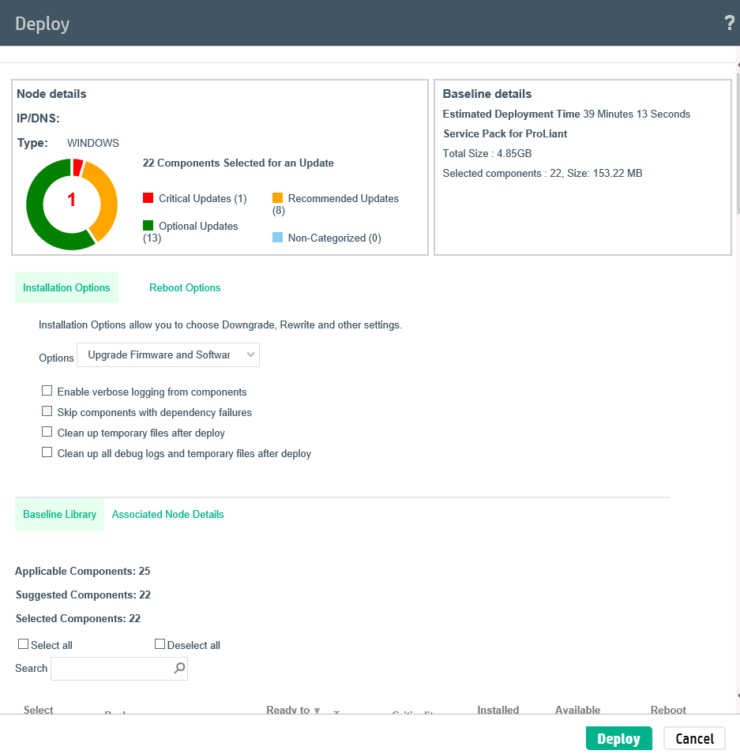
Chose to Deploy and the SUM will copy the Firmware and Drivers to the iLO NVRAM.

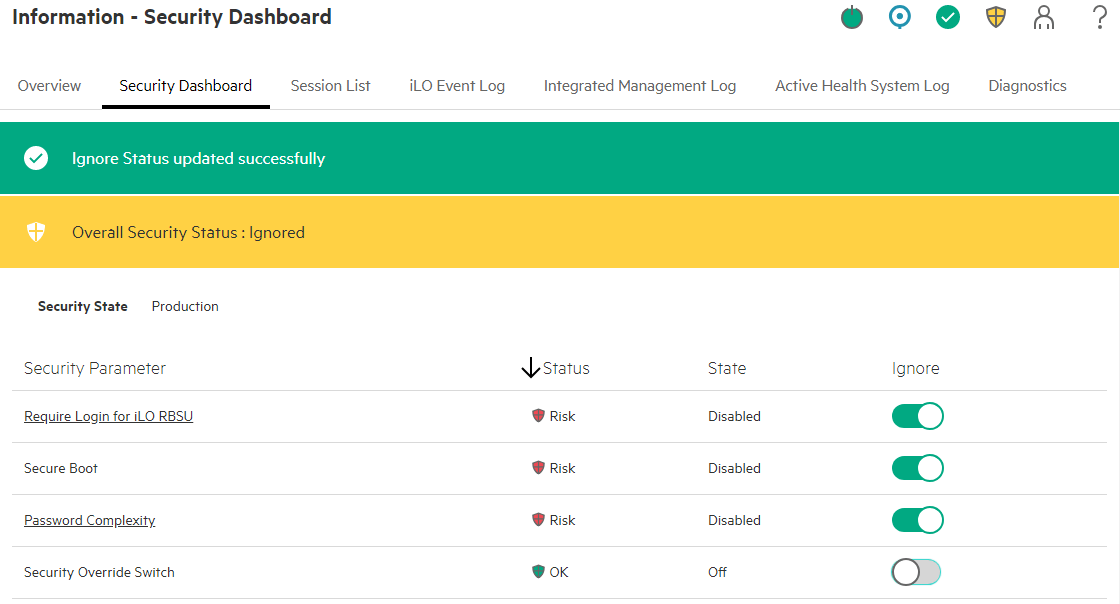
You can watch this in the iLO GUI:

iLO-Firmware

LO-Queue

The iSUT Service in the OS will now pick-up software from iLO and install.

When all is done, reboot the host, and you are done.

iLO-Complete

With iLO Amplifier

https://iloamplifierpack.itcs.hpe.com/

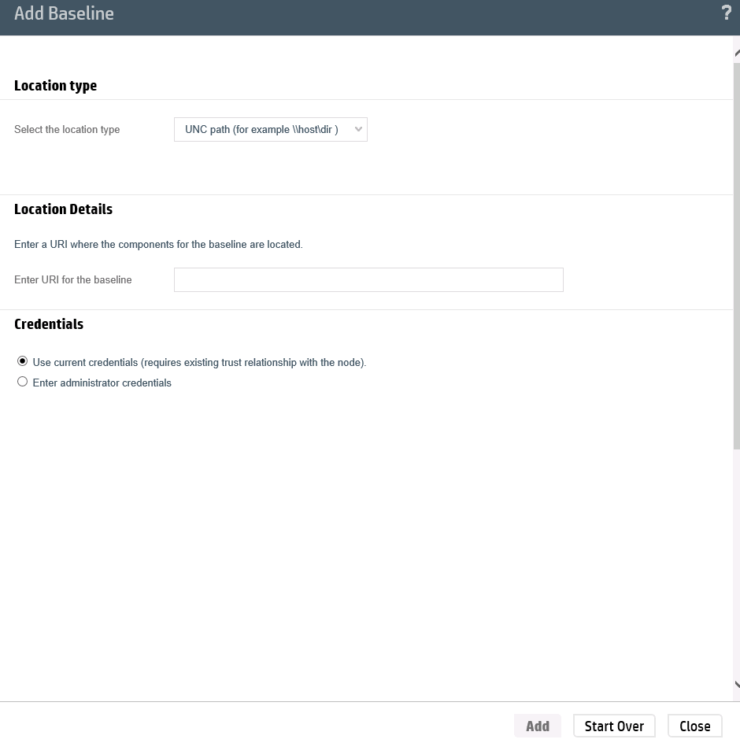
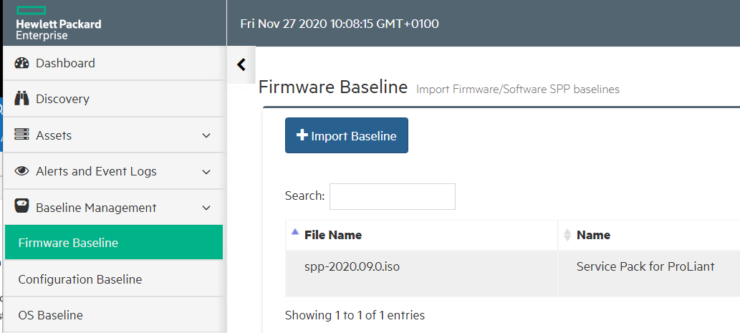
First, we must upload the SPP to the iLO Amplifier Repository.

This is done, by Firmware Baseline > Import Baseline:

Amp-Import

Amp-Upload

Amp-Baseline

Now we can Rollout the SPP to the Servers.

Select “Server Updates”:

Amp-ServerUpdates

If you see “SUT mode not supported, SUT not running. Host OS type not supported, AMS not Running.” the server is usually powered Off.

If you see “SUT mode not supported. SUT not running or “ iSUT is not enabled, you need to refresh the Server state using Assets > Servers > Select Server > Action > Refresh.

Amp-UpdateJob

From this point, it is the same as with SUM.

The Files are being copied to the iLO NVRAM, iSUT will see and then install them.

Armin Kerl

HPE iLO 5 New Features

HPE iLO 5 Update

This guest post is brought to you by Armin Kerl, if you fancy trying you hand at blogging check out our guest posting opportunities.

iLO5 is now over a year old and quietly HPE have implemented some nice enhancements. Let me describe some of the new features.

With iLO Firmware 1.40 the “iLO Advanced Premium Security” licensed features moved to the “iLO Advanced” license. So, the iLO ASPE License have gone.

To get all the following new features, the update of iLO Firmware alone is not enough. You need some more updates. Here is an overview, that works for me:

Firmware versions

Security Dashboard

The Security Dashboard collects some security settings and displays an overview of the security status. Most systems will now display a red warning.

Server security status
You can set the first three to ignore and it goes to yellow.


To get the green status the only way is to change the required to minimum.

Virtual NIC

Now, take a look at Security > Access Settings > iLO
You will find a new entry: “Virtual NIC”

ILO virtual NIC
What happens if you enable it? Example on Windows (support for Windows 2016, 2019, SLES 12, 15, RHEL 7.6). The OS will detect a new NIC and this NIC will get a fixed IP address: 16.1.15.1 (this an HPE reserved IP)

rtual NIC ILO device manager
This IP is internal only to the Server and does not go outside.
Now you are able to connect to the iLO with this fixed IP address.

Why would you need to do this?
– If you need access to the iLO and have no iLO network connection
– If you need access to the iLO and don’t want to Install the iLO OS driver

When not to use this feature. I have had some trouble when setting up a Windows Cluster and the cluster detected this NIC.

Update Service Settings

Scroll Down to Security > Access Settings > Update Service

Update service settings

This prevents a firmware downgrade to an compromised version.
Attention: permanently means for ever, there is no way to go back.

Intelligent System Tuning

The Performance Monitoring show some historical performance data.

Threshold Alerts
On the bottom page you can set Threshold Alerts. The Workload Performance Advisor compares the historical performance and recommends BIOS settings to enhance the performance.

secure erase ILO

Secure Erase

At the end the best. This has been a customer request for some time to secure erase the complete system. This would be useful If for example you want to resell you old server or have reached the end of your lease and need to wipe the whole system.

Start Intelligent Provisioning


If needed, skip the “First Time Wizard” > Perform Maintenance

HPE ILO Secure erase
Here it is, the “One-button secure erase.”

It not only deletes the volume, it:
– Resets the server to factory defaults
– Wipes the NAND (all ILO settings, logs)
– Erases all secondary storage
– Is compliant to NIST 800-88r1
O.K., this are the main new Features, thanks’ for reading.

Armin

Updating ProLiant Servers with HPE SUM

HPE SUM (Smart Update Manager) can be used to quickly update ProLiant hosts. This is a central console that will allow you to scan your ProLiant hosts, recommends updates and then apply them with little interaction.  This is far quicker than doing it manually and ensures that the correct packages are applied in the right order. The procedure to use HPE SUM is as follows

1 Download SPP ( Service Pack for ProLiant).  This contains not only all the patches you will need but also SUM (Smart Update Manager)

2 Once you have downloaded SPP run the ISO, when mounted you will need to run the launch_hpsum batch file.  Chose to run as Administrator

3 When started HPE SUM will appear in a web browser.  The home screen shows options to update the local server, add a baseline and to add remote nodes.

First we will add the baseline, From the drop down menu choose baseline library, add baseline , in the location field location If you are using SPP set the baseline path to CD Drive letter:\packages

4 Next we need to add the servers we wish to patch. Once you are in the Nodes screen choose, Add Node you will then see the following screen.  At a minimum you will need to fill out

  • IP Address / Hostname
  • Node type – Windows, ESX etc
  • Baseline to apply – If you are using SPP set the baseline path to CD Drive letter:\packages
  • Credentials

5 When you click on a host it will say checking / installing perquisites . Once that is complete you will get the option to perform an inventory

Select the baseline you created earlier

6 When the inventory is complete you will see the option to review and deploy updates

In the next screen choose the updates you wish to apply