3PAR Simulator Setup

Intro

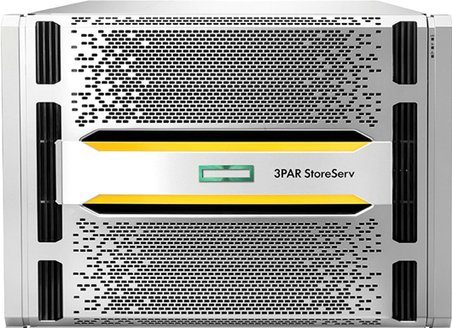
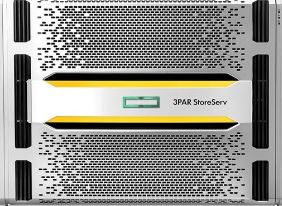
This post provides a full video and text guide to downloading and setting up the 3PAR simulator. The 3PAR Simulator is made up of a group of VM’s that emulate a physical 3PAR, this could be useful for testing, training etc. Once you have finished with this guide you can interact with your simulator using all the usual tools you would in the real world, the 3PAR Managements console, SSMC, CLI and API. You can configure the VM that represents the cages to have up to 4 cages and these contain a mixture of SSD, SAS and NL.

It can emulate the following features

  • Storage Provisioning including Thin-Provisioning
  • Exporting Virtual Volumes
  • Adaptive Optimization (AO)
  • Dynamic Optimization (DO)
  • Local Replication (Snapshot)
  • Remote replication (requires the setup of 2 3PAR simulators)
  • Up to 48 HDDs, 4 cage configuration
  • Cage types – DCN2, DCS7, DCS8
  • Disk types – FC, SSD, NL
  • 3PAR Management Console support
  • CLI and Remote CLI support
  • CIM-API (SMI-S) and WS-API support

Requirements

You will require a VMware environment running vSphere 5.5 or Workstation 11 or above. The process will involve creating three VM’s, two of the VM’s will represent the two nodes of a 3PAR whilst the third VM will represent the drive cages. The resource requirements for each of the three VMs are identical and fairly light:

  • One CPU
  • Three vNIC
  • 2GB RAM
  • 50GB disk space

Steps to install

To give you a feel for the process, the high level steps to install the 3PAR Simulator are:

1 Install the two cluster node VMs

2 Install the enclosure node VM

3 Create a private network between VMs

4 Complete initial simulator config

Video Guide

Enough chat! Lets get this 3PAR simulator installed, this video gives a step by step guide to get up and running as quickly as possible. You’ll find everything you need in the video including the 3PAR simulator passwords.

In part 2 we complete the simulator setup. Covering getting the simulator configured and operational tasks such as how to start it up and shut it down.


3PAR simulator publicly available

3PAR HPE

Intro

Firstly a quick announcement I’ve started a second blog called dataON27.com. This is talking about all the latest and greatest in the data protection arena. Please do take the time to follow along on Twitter and LinkedIN I am really excited about this project, there is lots of good stuff coming. HPE fans, yes this will include StoreOnce and RMC along with the rest of the portfolio.

Get on with it

Onto the main business of the 3PAR simulator. Getting hold of the 3PAR simulator has been shrouded in mystery and until now the most asked question to me on Twitter was how the #/@#!!! do I get the simulator? I can now finally reveal the wait is over, and it’s publicly available from the 3PAR software depot. To make it even easier for you here is the direct link.

Requirements

The previous simulator ran 3PAR OS 3.1.3, the public version of the simulator runs 3PAR OS 3.2.1 MU2. You will require a VMware environment running vSphere 5.5 or Workstation 11 or above. The process will involve creating three VM’s, two of the VM’s will represent the two nodes of a 3PAR whilst the third VM will represent the drive cages. The resource requirements for each of the three VMs is identical and fairly light:

  • One CPU
  • Three vNIC
  • 2GB RAM
  • 50GB disk space

The 3PAR Simulator requires a minimum of VMware ESXi 5.5 or above, or VMware Workstation 11 or later

What can it do?

Once you are up and running the simulator supports the following features:

  • Adaptive Optimization (AO)
  • Dynamic Optimization (DO)
  • Snapshots
  • Exporting Virtual Volumes
  • Thin-Provisioning
  • Remote copy

You can manage the Sim though all the usual 3PAR tools you would in the real world, the 3PAR Managements console, SSMC, CLI and API. You can configure the VM that represents the cages to have up to 4 cages and these contain a mixture of SSD, SAS and NL.

Steps to install

To give you a feel for the high level steps to install the 3PAR Simulator are:

1 Install the two cluster node VMs

2 Install the enclosure node VM

3 Create the private network between VMs

4 Complete initial simulator config


Have fun with it, and remember to stay in touch for more 3PAR news and tips through connecting with me on LinkedIn and Twitter.


3Par Simulator

The 3PAR Simulator is a VMware based group of VM’s that provides a virtualised 3Par system, the features normally provided by the hardware components, including the ASIC, HBA and enclosure are emulated in software. You interact with it in exactly the same way you would a physical 3Par i.e. via the HP 3PAR Management Console or remote CLI. Most of the major features including AO, DO, snapshots, exporting virtual volumes and even remote replication (if you have 2 instances of the simulator) are supported.

 Requirements

The simulator consists of 3 VM’s, 2 of the VM’s represent the nodes in the cluster whilst the third simulates the enclosures.

The minimum system resources required for each VM are:

  • One virtual CPU (single core)
  • Three virtual NICs
  • 2GB RAM
  • 50GB disk space (full or thin-provisioned)
  • Plus VMware ESXi 5.x or VMware Workstation 9 or 10


Installation

Setup is fairly straight forward as the VM’s come in the OVF format and just need importing into VMware ESXi or WorkStation. I have covered the high level steps to install the simulator to give you a feel for the process below, for detailed step by step instructions refer to the release notes that come with the simulator.

  • Cluster Nodes Installation – First you deploy two VM’s from an OVF, these VM’s will act as the controller nodes of the virtualised 3Par system
  • Enclosure Node Installation – Next deploy another VM again from OVF that simulates the enclosures. You can have up to 48HDDs across 4 cages
  • Network Configuration – Each of the simulator VM’s has 3 NICs. The first NIC will be the IP you use to manage the device when using the management console or CLI. The second you will not need unless you are using RCIP. The third will be connected to a local private network allowing the 3 VM’s to talk to each other


Configuration

Once you have the VM’s installed the next high level steps are:

  • Power on all the VM’s
  • Create cages and disks – Connect to the Enclosure VM and choose how many shelves to create and start esd daemon. The default choices are:
    • 1 cage, 24 HDDs 1 DCN1 cage with 24 FC drives
    • 4 cages, 48 HDDs 1 DCN1 cage with 6 FC drives and 6 SSD drives 2 DCS2 cages with 6 FC drives and 6 SSD drives each
    • 1 DCS1 cage with 6 NL drives and 6 SSD drives
    • 4 cages, 24 HDDs 1 DCN1 cage with 6 FC drives 3 DCS2 cages with 6 FC drives each
    • 4 cages, 48 HDDs 1 DCN1 cage with 6 FC drives and 6 SSD drives 3 DCS2 cages with 6 FC drives and 6 SSD drives each
  • Assign Serial Number – Connect via console to both controller VM’s assign serial numbers and then reboot
  • OOTB procedure – Configured by logging into the first controller node and providing the following details; a system name, IP address information, NTP Server (optional), DNS Server (optional
  • Install Management Software – If you don’t already have them installed install the CLI and Management Console to allow you to connect and manage the virtualised 3Par
  • Get the look – Finally spray laptop black and yellow 😉

To stay in touch with more 3PAR news and tips connect with me on LinkedIn and Twitter.


For a more up to date article and to find the link for downloading the simulator go here.