Today I wanted to do a beginners guide to 3PAR SSMC to help learn how best to use it. So far in this StoreServ Management Console 101 series we have covered what’s new in the latest version, how to install SSMC and how to add systems to SSMC. Today I want to run through the basics of the new interface so you can get up and running fast.
SSMC looks significantly different to the 3PAR Management Console, so the purpose of today’s post is to provide some familiarisation for those moving across to SSMC or starting out with 3PAR for the first time.
Logging onto SSMC
SSMC is a web based console to access it you just need to enter the hostname of your SSMC server and specify the port 8443 in your web browser, for example https://ssmcserver:8443/. Authentication is as before either with local accounts defined on the 3PAR or via LDAP. If you have ben using the IMC previously, the accounts you have used to login to that will continue to work.
The Dashboard
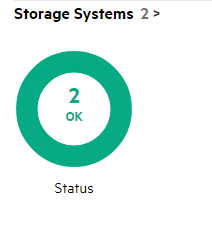
Once you login you are presented with the Dashboard, this is your home page if you like and provides an overview of all your connected systems on areas like health, capacity and performance.
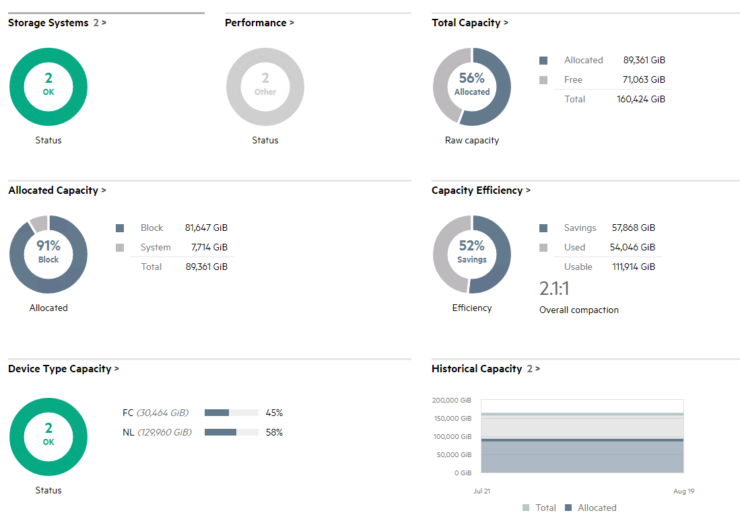
If you want to drill down on any item you can do so by clicking on the donut or by selecting the title (storage systems in the screenshot below) above the donut.
Most of the donuts are self-explanatory. The performance donut relates to Threshold Alerts, which are a new feature that allows you to set alerts up for most components of the system. An example of a Threshold Alert would be when host ports exceed 50% utilisation raise an alarm. When one of these alerts is triggered it will be reflected in the performance donut.
There is no home button for the dashboard view you must go through the Main Menu. As I find myself regularly going here I have created a shortcut to the Dashboard and added it to the links toolbar of my browser. Should you wish to do the same the shortcut is https://YourSSMCServer:8443/#/dashboard
Main Menu
To move around between screens you have what was called the Mega Menu in older version, but now has been demoted to be named the Main Menu. You click on the drop down arrow at the top left to pull down the Main Menu. By default the Main Menu will appear in a minimised form only showing the most common tasks.
To see all the available options you need to click show all and you will then be presented with the view below.
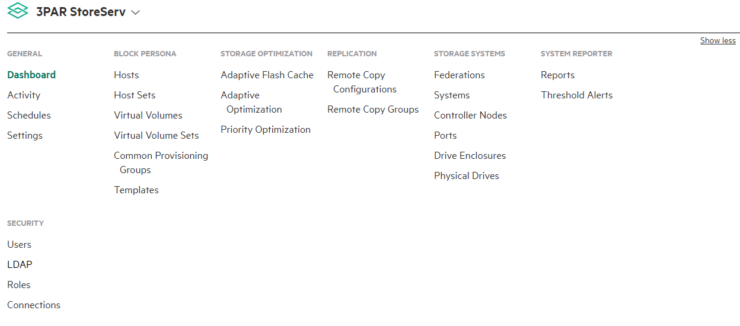
The available screens are grouped into categories. The block persona category for example contains the screens: hosts, virtual volumes,CPGs this would have been called the provisioning area in the 3PAR Management Console.
Search
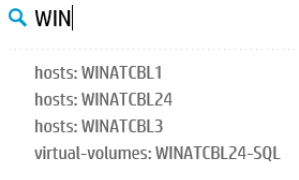
Next to the Main Menu at the top of the screen you have the Search function. The Search function allows you to search just on the screen you are in to narrow a list of VV’s for example or searches the entire system. Below shows an example of where a Search has been performed everywhere for the term WIN and both hosts and virtual volumes have been found.
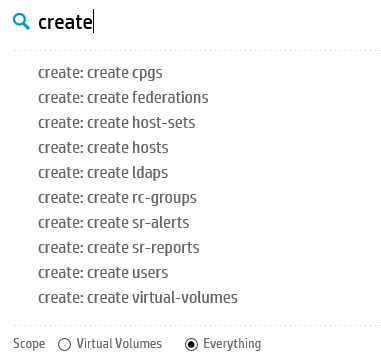
The other way Search can be used it by typing create, which again is context sensitive so the results will depend on which screen you are in. Below I have typed create in the virtual volumes screen.

Below I have again typed in create but this time checked the everything box and I can then see all the create options not just those relevant to virtual volumes.
Getting Help
The online help is pretty good and can be accessed by clicking the question mark on the top right of the console. There are 2 animated help guides that walk you through basic navigation and provisioning listed under screencasts in help. If you are on any screen and not sure what to do you can again click on the question mark and select help on this page.
I also wanted to highlight where you can find documentation online:
HPE 3PAR StoreServ Management Console 3.1 Administrator Guide
HPE Management Console 3.1 Release Notes
HPE 3PAR StoreServ Management Console User Guide
Working with a screen
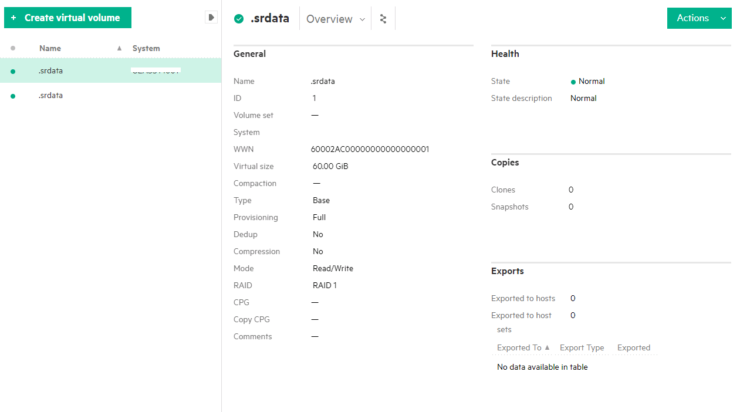
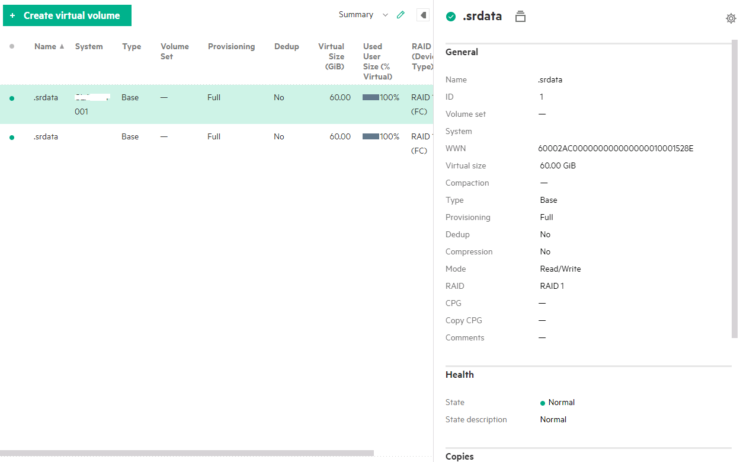
Once you have chosen a screen to work with it will be split into two halves, on the left is your list pane and on the right the detail pane. The screenshot below is the Virtual Volumes screen. The description of the panes is pretty self-descriptive you see your list of items on the left and then further detail for each on the right.
 Rather than have to click through each item individually to see more detail you can click the expand arrow in the list pane (I have highlighted in the above screenshot), this will give you a view like below.
You can filter your list of items either through the search function or through using the drop down filters at the top of the page, in the below screenshot the provisioning filter is displayed.

For each detail pane you can choose from several different views, by clicking on the views drop down button. You can think of the views almost like the tabs in the 3PAR Management Console, you have chosen the item you want to work with and are now looking into different elements of it.

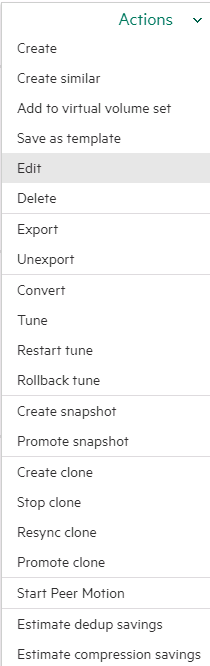
To make changes to any item you select the actions menu, this is located in the top right of the details pane. The action menu is context sensitive to which screen you are in. Below is an example of the available actions from the Virtual Volume screen
Map View
The Map View is something that helps pull it all together by mapping the relationship between components. This is an example of Map View with AO. I think some components suit Map View better than others and AO is an example where it does work and it is useful to see the relationship between objects.

To get more of a feel for the console check out these videos: