Creating a 3PAR document bundle

This guest post by Armin Kerl (Cali) shows three different methods you can use to create a document bundle for your 3PAR.  Lets take a look at the first method:

Service Processor 4.x

Here is a quick tip for 3PAR users that have a Service Processor 4.x. version.

Creating document bundle using the 3PAR service processot

1 Login into the Service Processor Web Site

2 Now Select: Files > Files > Your serial number > Config > Download the most recent File

3 Rename the File to My3PARDoc.html

Service Processor 5.x

1 Login into the Service Processor Web Site

2 Now Select: General > Files and set the filter Type = Collection (CONFIG)
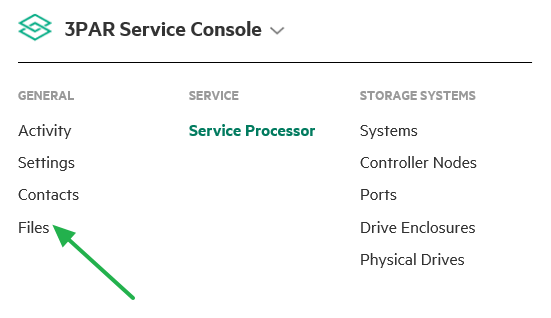
3 Select the latest file and choose Actions > Download

3 Rename the File to My3PARDoc.html

That is all, you just got a full documentation set for your 3PAR.

StoreFront Remote

If you enable 3PAR for call home, there are additional ways:

First is HPE InfoSight

1 Login with your HPE Passport Account.

2 If you have not mapped the 3PAR with your Account, do this by “Register Systems”.Once done wait for 1-2 Days. Then InfoSight > Infrastructure > 3PAR StoreServ > Systems should show the 3PAR Systems.

Register 3PAR with InfoSight

3 Select the 3PAR and on the right Side Actions > “Create PDF”

Creating document bundle using StoreFront remote

StoreVista

The next method uses StoreVista

Here you can generate some reports that the system mailed to you on one-time or regular basis. Be sure to Read the Instructions in the Download Section

StoreVista document bundle method


3PAR & InfoSight

InfoSIght is now available for 3PAR to get up and running check out my 3PAR and InfoSight Setup Guide

Whilst at HPE Discover I managed to nab some screenshots of the new 3PAR implementation of InfoSight. You can read my post about all the InfoSight announcements.

To get InfoSight up and running with 3PAR  you will need a have a minimum of 3PAR OS version 2.2.x and Service Processor (SP) version 2.4.2, since this is a very old release this should allow most customers access. If however you wish to have the the integration with VMware the requirements are a little more stringent you need to be running 3PAR OS 3.3.1, have an active support contract and have the 3PAR communicating back to base and a service processor on 5.0 MU3. The initial release, available in January will focus on delivering greater insight into the performance of VM’s on the storage.  This is achieved by adding additional functionality to the Service Processor which will allow it to talk to the vCentre in your environment.  Once you have your 3PAR setup with InfoSight you will see two key areas of information, storage information which today will be the same as information being retrieved from StoreFront remote. Secondly you will see the virtualisation layer info being pulled back from vCentre.

Screenshots

Below is the screenshots I managed to gather of InfoSight with 3PAR:

Key host storage performance stats – IOPS, latency and throughput

3PAR InfoSight Storage Performance

More typical storage related information

3PAR Storefront Remote

High level VM overview

3PAR InfoSight VM overview

The following screens allow “noisy neighbour analysis”. They look at various stats to identify which VMs are working your environment the hardest and potentially causing contention in the environment.

Top VMs by latency and IOPs

InfoSight VM IO Contention

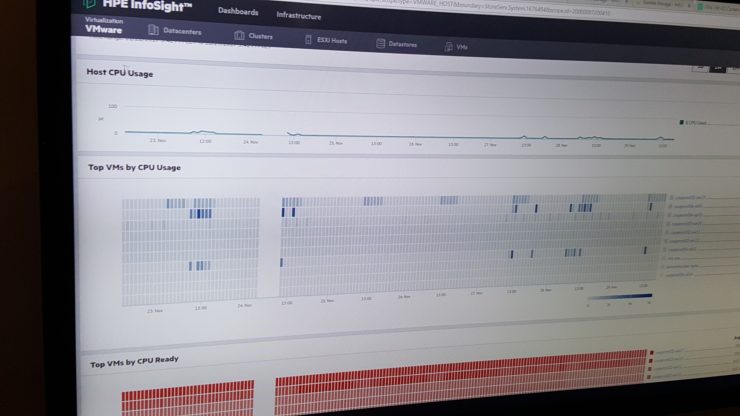
Top VMs by CPU usage

Top VM by CPU Useage

Top VMs by data usage

Top VM by data useage

This menu shows all the contention reports available

Seen the 3PAR simulator video setup guide?


3PAR Simulator Setup

Intro

This post provides a full video and text guide to downloading and setting up the 3PAR simulator. The 3PAR Simulator is made up of a group of VM’s that emulate a physical 3PAR, this could be useful for testing, training etc. Once you have finished with this guide you can interact with your simulator using all the usual tools you would in the real world, the 3PAR Managements console, SSMC, CLI and API. You can configure the VM that represents the cages to have up to 4 cages and these contain a mixture of SSD, SAS and NL.

It can emulate the following features

  • Storage Provisioning including Thin-Provisioning
  • Exporting Virtual Volumes
  • Adaptive Optimization (AO)
  • Dynamic Optimization (DO)
  • Local Replication (Snapshot)
  • Remote replication (requires the setup of 2 3PAR simulators)
  • Up to 48 HDDs, 4 cage configuration
  • Cage types – DCN2, DCS7, DCS8
  • Disk types – FC, SSD, NL
  • 3PAR Management Console support
  • CLI and Remote CLI support
  • CIM-API (SMI-S) and WS-API support

Requirements

You will require a VMware environment running vSphere 5.5 or Workstation 11 or above. The process will involve creating three VM’s, two of the VM’s will represent the two nodes of a 3PAR whilst the third VM will represent the drive cages. The resource requirements for each of the three VMs are identical and fairly light:

  • One CPU
  • Three vNIC
  • 2GB RAM
  • 50GB disk space

Steps to install

To give you a feel for the process, the high level steps to install the 3PAR Simulator are:

1 Install the two cluster node VMs

2 Install the enclosure node VM

3 Create a private network between VMs

4 Complete initial simulator config

Video Guide

Enough chat! Lets get this 3PAR simulator installed, this video gives a step by step guide to get up and running as quickly as possible. You’ll find everything you need in the video including the 3PAR simulator passwords.

In part 2 we complete the simulator setup. Covering getting the simulator configured and operational tasks such as how to start it up and shut it down.