I wanted to start a series of posts looking at 3PAR 101, a back to basics/ beginners guide to 3PAR. The perfect place to start is by looking at the 3PAR architecture, and specifically how 3PAR uses layers of abstraction to deliver a unique and flexible approach to RAID.
Introducing Chunklet!
Let’s introduce Chunklet, as its Chunklet that enables 3PAR to have a unique architecture and enable many of its capabilities.
Traditional RAID
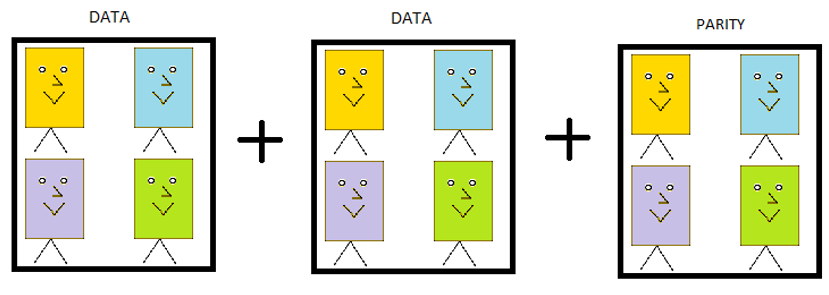
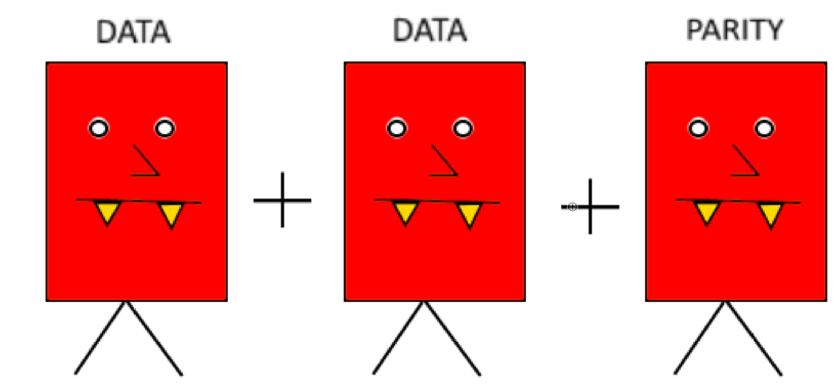
Things were not always so good for Chunklet, back in the day Chunklet was a bad dude with a bad attitude. He existed on a traditional storage array and since he didn’t get on with anyone he demanded a whole disk to himself. So on a traditional storage array to set up a simple RAID 5 2+1 set, you would need 3 disks, 2 data and 1 parity each of which was dedicated entirely to being part of that RAID set. This traditional and inflexible approach is shown in the diagram below:
3Par Chunklet
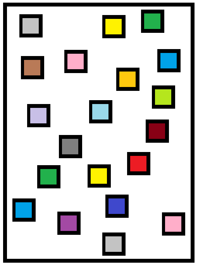
Over time Chunklet mellowed out, he realised hey it’s good to share and instead of demanding a whole disk to himself he was happy with 1GB of any given disk. This is what happens in a 3PAR system, whenever a disk is added to the system it is divided into 1GB blocks of space called Chunklets. Prior to the 7000 and 10,000 series the chunklet size was 256MB, the reason for the increase to 1GB was to reflect the growing size of disks.
3Par RAID
In a 3PAR system like in a traditional storage system RAID is used to combine multiple disks together but instead of using entire disks data is striped across chunklets. Let’s zoom in on a small number of disks to see how this looks.
In this simple example above we see 3 physical disks each with 4 chunklets per disk, each different colour represents membership of a different RAID 2+1 set. For example there is a yellow RAID set made up of a data chunklet from the first 2 disks and a parity chunklet from the 3rd disk, real world there would be a lot more chunklets per disk i.e. a 450 GB disk would consist of 450 chunklets. To summarise in a traditional storage system each disk is dedicated to being a member of one RAID set, by using chunklets multiple RAID sets can co-exist on the same set of physical disks.
Looking at the diagram below we see chunklets enable not only multiple different RAID sets to exist on a single physical disk but that they can also have different RAID levels. The diagram show 4 physical disks with different coloured chunklets representing membership of different RAID sets. The orange and blue chunklets are members of a RAID 1 1+1 set co-existing alongside a RAID 5 2+1 (Green) set and a RAID 5 3+1 (yellow), all on the same physical disks.
Logical Disks
To allow for large volumes of data and to enable the data to be striped across as many disks as possible, multiple RAID sets are combined together in rows. The number of RAID sets combined together is the row size, for example if the above orange and blue RAID 1 sets are combined together the row size would be 2. A logical disk is a collection of chunklets arranged as rows of a RAID set.
CPG
The next logical layer down is CPG’s (Common Provisioning Groups). CPG’s are simply a number of logical disks joined together to form a contiguous space. We will cover CPG’s in part 2 of this series in detail, but for now just know CPG’s are a pool of space. Whilst CPGs have many unique features for simplicity in traditional terminology you can think of a CPG as a RAID group.
Virtual Volumes
Finally we get to the building block we are able to assign to a host, Virtual Volumes. Virtual volumes (VV’s) draw their space from CPG’s and in the case of thin provisioned VV’s grow on demand and only consume space from the CPG as needed. In traditional terminology you can think of a virtual volume as a LUN.
Putting It All together
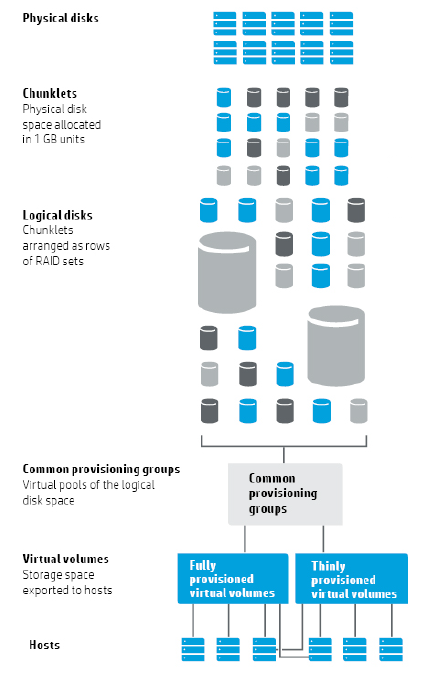
Let’s pull everything together we have looked at so far to see the complete picture – when a disk is added to the system it is subdivided into 1GB blocks called chunklets, these chunklets are arranged as rows of a RAID set to form logical disks. CPG’s (common provisioning groups) pool together the capacity of the logical disks. Virtual volumes then draw their space from the CPG and can be presented to hosts. The diagram below is taken from the HPE 3PAR best practices guide and again shows how all the different logical levels fit together but in a pictorial format.
What have chunklets ever done for me?
Phew, that’s the hard bit done now let’s look at benefits chunklets give. The benefits in summary are flexibility and performance, let’s look at some examples:
- Maximise utilisation – The same physical disks can provide many different RAID and availability options
- Performance – data is distributed across many disks enabling wide striping and eliminating hot spots
- Planning – No need to size and allocate space to RAID groups upfront. With 3PAR you can create CPG’s as required with no upfront space requirement and then space is only consumed as it is demanded.
- Drive size flexibility – since RAID is striped at the chunklet level and not the entire disk different sized disks can be used
- RAID flexibility – RAID levels can easily be changed
- Disk failures – when a disk fails the spare chunklets are spread across many physical disks so it a one to many operation, allowing a quick rebuild
This is a complicated topic but hopefully this post has helped to gain a fundamental understanding of 3PAR architecture. Continue reading this 3PAR 101 guide:
3PAR 101 – Part 3 – Virtual Volumes and Vlun’s
Don’t forget to keep in touch on Twitter and LinkedIn.
Further Reading:



Can you also explain data and spare chunklets and how they distribute and when? I know professionals can choose percent of spare chunklet allocation during OTB procedure, but i still can’t undertand why they are preallocated before CPGs formed.
Alexsey – you are correct a number of chunklets are allocated at system initialisation as spares. The number of chunklets that are marked as spares will depend on the size of the largest drive magazine. As it’s based on the size of the drive magazine and is not CPG dependent they can be defined at setup..
did you mean contiguous space, rather than contagious? wouldn’t want to catch a disease from my storage 😛
Mike – Yes I really did mean contiguous. Contagious storage is a whole other post! Thanks
sir,
can you provide me 3par simulator freely on my 4shared account. i will thankful to you.. please
Amit
Hi Amit
Access is currently only via Twitter, please follow the process in the post
Thanks
Hello
can you help me with LD size. I understand the step size, the set size (set at CPG creation). But when I look at LD on my 3PAR, I can see LDs with different size,
I can see by example that a VV is composed by 128MB and 256MB LDs.
What is the rules in the 3PAR to decide LD size inside a CPG ?
I aslo don’t fully understand the size shown:
showld -d tp-3-sd-0.79
Id Name CPG RAID Own SizeMB RSizeMB RowSz StepKB SetSz Refcnt Avail CAvail —–CreationTime—— —-CreationPattern—-
100 tp-1-sd-0.79 CPG1_R5_SAS10K 5 2/3/0/1 258048 294912 1 128 8
where size shown is 258048 MB, should be 258GB ?
and row size is 1, step is 128K, set is 8, so LD size should be 1*8*128K = 1GB ..
AM I wrong ?
thanks in advance
Pat
Like you say LD size is basically sum of the rows in the RAID set.
For example if you have a RAID 5 3+1 CPG the minimum size of the LD will be 4 chunklets ie 4GB on a 7000 series. When you create a volume the system will automatically create the underlying LD’s for you, rounding up so the size is divisible by the chunklet size. Each type of LD will then also have a max size for example RAID 1 LD has a max row size of 40.
In summary LD’s will be created to meet the requests of Virtual Volumes, they will be rounded up to the nearest chunklet and be between the maximum and minimum LD size. Check out the Concept Guide it also explains it in there.
Thanks….Really excellent explanation
Cool thanks for the feedback. Glad you found this 3PAR intro useful.
Richard,
You did a very nice job on this explanation, I am grateful to you.
Thanks!